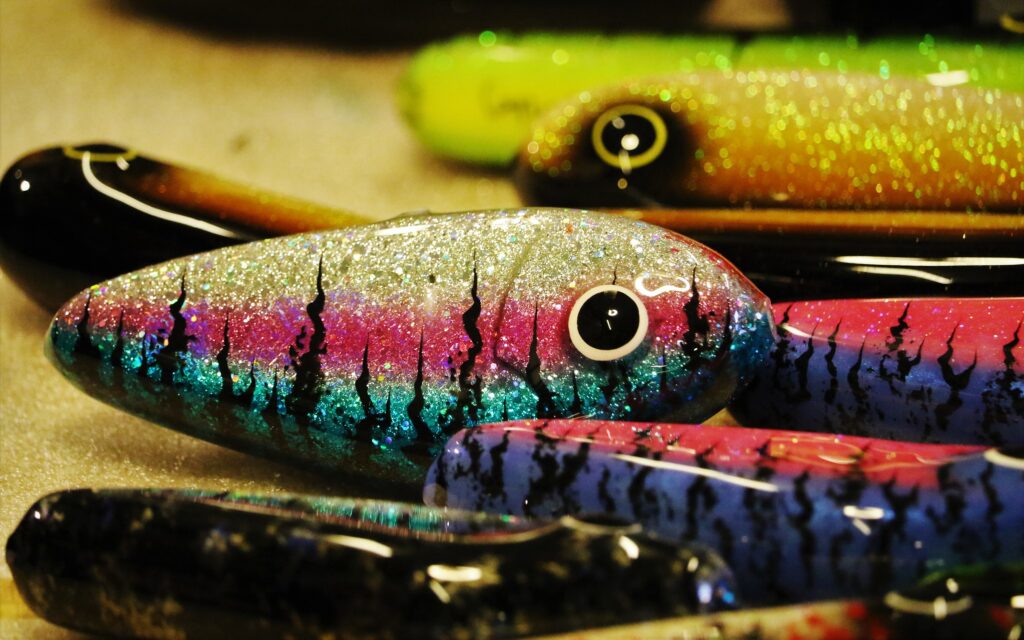
I was browsing around a tackle shop the other day and it stuck me – why am I paying so much for custom painted lures when I could just airbrush my own? Surely I can save some money while having some fun painting my own designs.
After all, most of the paint jobs you see in-store are not miraculous pieces of art. With the right technique and a little practice, an airbrush hobbyist can design custom paint jobs that will take their fishing game to the next level.
As an airbrush artist of many years, I immediately started researching to find out what the best airbrush paint for fishing lures is and I’d like to share what I found out:
Water based acrylic airbrush paints are the best for painting fishing lures. Unlike other urethane based airbrush paints, water based acrylics are non-toxic and easy to use. Brands like Createx paint work especially well for binding to the lure and providing great color and depth to the design.

Airbrush paint vs normal paint for fishing lures
Airbrush paint is made specifically for an airbrush. If you want to get the shading and blending effects characteristic of airbrush art, you will have to use airbrush-specific paint.
The main difference between airbrush paint and normal paint is that airbrush paint has finer pigments. These fine pigments are made to flow through the needle and nozzle system to achieve atomization and make a seamless spray pattern.
Normal paint will not work in an airbrush. DON’T TRY IT! (it will plug up your airbrush)
Airbrush paint generally comes in 3 different kinds of bases:
- Water based acrylic paint
- Alcohol based paint
- Urethane based paint
Alcohol based airbrush paint is mostly used for temporary tattoo style artwork.
Urethane based airbrush paint is used for automotive applications. It’s high quality and flows out of the airbrush like magic. However, it is quite toxic and a great ventilation system is needed to work with it.
Water based acrylic airbrush paint is non-toxic and used for all kinds of airbrushing applications. It’s non-toxic, easy to work with, and will bind well to the surface of plastic or metal fishing lures. This is why I recommend using water based acrylic airbrush paint for fishing lures.
Best airbrush paint for fishing lures
Water based acrylics are your best bet for airbrushing fishing lures. Here’s your 3 best options for water based acrylic paints:
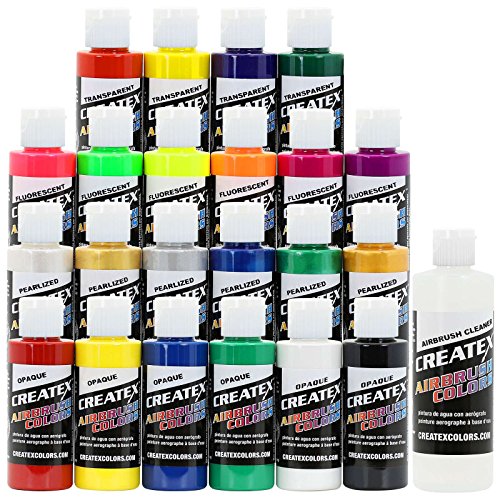

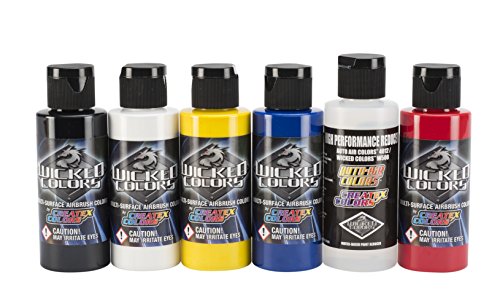
Createx and Wicked are made by the same company and are similar aside from small changes to the color palette. I have been using these water based acrylics for years because they just work so well in an airbrush. The flow is very nice and with the proper reduction, you can get urethane-like results from a water based acrylic.
Createx and Wicked also come ready to spray. Simply pour the paint directly from the bottle into the airbrush hopper. You can add a few drops of reducer or water to tweak the paint consistency, but it’s not necessary with most colors.
Createx and Wicked can also be mixed together, so if you are into mixing custom color tones, you can do so in a separate container or directly in the airbrush hopper.
Golden High Flow is another great water based acrylic airbrush paint. It has a rich color palette and a premium flow profile. The one downside is that these paints are transparent until mixed with white. The Golden Airbrush Medium is also touted by many as one of the best reducers in the industry. Get a bottle of opaque white and a bottle of Golden Airbrush Medium and you’ll be set for high grade airbrush detail work.
How to airbrush a fishing lure
Before starting your fishing lure painting project, make sure that you have everything you need:
What you’ll need
- Fishing Lure Blanks – what fishing lure blanks you get is completely up to you. This set from amazon has an assortment of crank bait. If you want a different action or shape, your local tackle shop should have some or could order a set in.
- Airbrush setup – typically consisting of an airbrush, a compressor and a hose. Checkout these beginner airbrushing kits to get everything you need.
- Airbrush Part Holder – used to hold the lure in place for better control while you paint
- Airbrush paint – Water based acrylic
- Airbrush paint reducer – paint reducer helps make your paint the right consistency for improved paint flow. It also thins the paint to be more transparent. Water also works to reduce water based acrylics. However, water doesn’t flow quite as well. So it doesn’t hurt to have a bottle of reducer nearby in the event that water doesn’t get the paint consistency you’d like.
- Airbrush cleaner – airbrush cleaner is a must-have. There is nothing worse than having a clogged airbrush that isn’t working properly. Water can clean the airbrush between colors but sometimes it’s not enough to dissolve bits of dried paint that get stuck in the nozzle.
- Airbrush stencils – painting stripes or scale textures onto you lures is best done with stencils. You can either buy them or make them on your own.
- Wiping rag for cleaning your airbrush
- Epoxy Resin to use for the protective top coat. Do not get the 5 – minute epoxy! It dries way too fast and won’t make a nice even layer.
- Paint Brush for applying the epoxy resin top coat. Get something cheap and disposable because you won’t be getting the epoxy out of the brush once you use it.
- Styrofoam cup for mixing the epoxy resin
- Clothes Pins for hanging up the fishing lures while the top coat dries
Step by Step
- Setup airbrush workspace with compressor set at proper psi. (between 10 and 30 PSI, use the air regulator on your compressor to set the air pressure)
- Apply light coats for base layers -> you can always put more paint on but you can’t take it off. Water based acrylics also dry almost instantaneously when applied in light layers. You want to avoid dripping and pooling at all costs.
- Use stencils to apply textures or patterns in layers. -> hold stencils close up to the surface of your lure and spray directly where you want the pattern to be. Stencils work great in airbrushing because they allow you to “break the rules” of color layering. When you usually start from light colors and go darker, you can apply a light stencil pattern onto a darker base.
- Clean out your airbrush between colors -> try to estimate the amount to paint you will use in your hopper so you don’t have to waste paint or bother with putting it back into the bottle. Sometimes all you need is a few drops of a color. When the hopper is empty, fill the cup with fresh water and discharge the airbrush for a few seconds until the stream runs clear. Then, take your rag and hold it over the end of the nozzle so it blocks the flow of air. Push the trigger down and pull back so air bubbles back into the hopper – this cleaning procedure is called “backwashing”. Pour out the excessive water and wipe the inside of your hopper with your cleaning rag. Rinse and repeat this process until there is no trace of the last color. If you are using a very dark or stubborn color, use a few drops of airbrush cleaner in tandem with water. Warning: straight airbrush cleaner is an irritant to your nose when atomized so try to avoid spraying large clouds in a closed area.
- Apply a Top Coat – First, squirt both parts of your epoxy resin into your styrofoam cup. Stir the epoxy well with your paint brush. Use the paint brush to apply a thin layer of epoxy on the surface of your fishing lure. Make sure that every surface is completely covered so no water can seep through and wreck the paint job.
- Hang fishing lures to let top-coat dry – use the clothes pins to hang the fishing lures for 24 hours until the epoxy resin dries solid.
When your fishing lures are dry and solid, look for any gaps or air bubbles in the top coat. If there is any part that didn’t get sealed, apply another light layer of epoxy and wait for another 24 hours.
Once the entire lure is covered and the epoxy dried, you’re done! Get your tackle box packed up and head down to the river because it’s time to go fishing!
If you’re like me, it also dawned on you that paying a premium on fishing lures in store can get expensive. Designing custom fishing lure paint designs can really give you an edge as a fisherman and also makes for a fun and rewarding project.
Hopefully this guide has given you the info you need to get the right airbrush paint, airbrush kit, and supplies to start airbrushing fishing lures today.

Thank you for this article, I am a beginner and need to know the basics
Thanks again
You’re welcome! Any other questions, let me know!
Not sure if anyone reads these or not, but, guess I’m considered a novis at lure painting, I hv researched enough long hour making a airbrush spray cerakote for my gun making & painting schemes I do. So I kinda got a grip on this. Always room to learn. I am buying a new compressor using the Testors blue no change pressure compressor but hv a regulator attached to hose.
Going to get nice compressor with H2O traps etc also buying a nice airbrush. This where a rookie can get screwed least I feel they can. I am prob going with a airbrush that is mid priced under125.00. Looking at Paasche TG#2L dual action brush, or vision TG#0-AD both di fine lines and wider overage both under 150.00 research a lot I’m buying them as cheap as possible. Research also tells me water base paints or urathane paints best for lures. Can’t believe water based paints for lures. But top coat I guess seals them. I am researching wicked created paints kits as many colors as I can possibly buy for as cheap as I can. I found a paint easy pour just don’t know if yet are any good 84 colors for 88.90 on Amazon who knows till I try them
He Bruh.
I weld w/ a Co2 tank w/ my Lincoln wire feed. I also used to paintball when kids were younger. Long story short. I was browsing on YouTube & found this guy used his Co2 tank to air brush. No dryer or h2o separator needed. But u will need a regulator. I have a 20lb tank which well last me for quite some time. Welding & airbrushing.They’re also smaller tanks available. Ur local welding store can help if intrested. FYI! Also I tie bass & striper flies & lures. A fly dryer which will rotate ur lure @ a S L O W rate that will keep ur epox/resin from DRIPPING. They can be costly. But u can make it on ur own. My daughter in law purchased a resin mug dryer. I tweaked it to my preference but still @ her use also. Yes I did read ur post. Hehe good luck happy painting &CATCHING!!!
Hey
what do you use when you painting rubber baits
Mats
Hey I’ve never painted a rubber bait with airbrush before! Water based paint should still work but you could also try solvent based – might adhere to the substrate a little better.