So you’re getting into airbrushing, you’re a complete beginner and you have no idea where to start.
It’s ok, we’ve all been there.
The world of airbrushing is large and it can be overwhelming when you decide to get into it.
Luckily, it is possible to start airbrushing and start getting good at it right away!
People of all skill levels can use an airbrush. Beginners can learn how to make eye-catching airbrush art quickly by using basic techniques. With practice, a beginner airbrusher can quickly become proficient in advanced airbrush techniques.
This article is what I wish I had when I first started airbrushing. Many mistakes were made to accumulate the information contained in the following paragraphs.
My aim is to give you the information you need to start RIGHT AWAY, cut years off of your learning curve, and GET GOOD FAST.
In this article, you’ll learn what airbrushing is, the types of airbrushes, the best equipment and supplies for beginners, and how to use your airbrush like a pro.
If any of that interests you, read on!
What is Airbrushing and How Does it Work?
Airbrushing is the process of using an atomized paint stream to make art. Atomization is the process of turning liquid into tiny airborne droplets. An airbrush achieves atomization by using compressed air and forcing the liquid out of a tiny nozzle.
Learn more about how atomization works in this article about how an airbrush works.
I like to think of airbrushing like spray painting except with a little more finesse. The main difference with spray paint, however, is that the spray can is pressurized with aerosol.
Airbrush uses good old-fashioned air.
Airbrush Applications
Airbrushing can be used for so many different things. Some of the most common applications include:
- figurine painting
- body painting
- illustrations
- automotive painting
- cake decorating
- fishing lure painting
- snowboards
- helmets
- cake decorating
- murals
Airbrush is so versatile because it allows you to paint in wide fade patterns as well as draw fine detail work. It has a unique soft-brush quality to the stokes that it produces which is very appealing to many viewers.
Now that you know what airbrushing is and what it’s used for, let’s take a look at the different types of airbrushes out there.
The Different Types of Airbrushes
Airbrushes are not all created the same. There are three basic airbrush characteristics that can be combined to produce many different kinds of airbrushes:
- Feed Types
- Action Types
- Mix Types
These three categories are made in different combinations to make different airbrush types.
For example, a double-action, internal mix, gravity-fed airbrush is the most common in the airbrush world today (this is also my top-recommended type of airbrush for beginners).
Here’s a little more information about the different types of airbrushes.
Airbrush Feed Types
The airbrush feed refers to how the paint comes into the airbrush.
Airbrushes have three different feed types:
- Gravity Fed
- Siphon Fed
- Side Fed
Gravity Fed Airbrush
Gravity-fed airbrushes are the most common type of feed system. They use a paint cup located on the top of the airbrush to hold paint.
The paint then simply drops into the body of the airbrush where it is mixed with compressed air.
The compressed air forces the paint out of the nozzle and atomization occurs.
As the paint is progressively atomized, more paint drops into the body until the cup is empty.
The main advantage of the gravity-fed system is its simplicity – it has fewer parts which allows you to operate, assemble, and clean the airbrush with ease.
Siphon Fed Airbrush
Siphon-fed airbrushes have a bottle underneath the airbrush and suck the paint into the body using low-pressure dynamics.
As the compressed air moves through the airbrush, it creates a low-pressure air pocket directly over a tube that connects to the paint bottle. This siphons the paint into the body where it is introduced into the air stream and atomization occurs.
Siphon-fed airbrushes allow you to hook up a large bottle of paint and stick to one color at a time. This capability makes siphon-fed airbrushes very common with temporary airbrush tattoos and t-shirt artwork.
Side Fed Airbrush
The side-fed airbrush combines both the gravity-fed and siphon-fed airbrush styles. The paint cup is located on the side of the airbrush and can be either siphoned or gravity fed into the body.
Whether you’re feeding the paint in by gravity or siphon depends on the positioning of the airbrush.
Side Fed Airbrush held upright = Gravity fed
Side Fed Airbrush held at an angle = Siphon fed
Side-fed airbrushes are therefore good for airbrushing at awkward angles because you can essentially hold it upside down. Their downside is the relatively complex feed system that is hard to take apart and clean.
Airbrush Action Types
There are 2 main types of airbrush actions:
- Single Action
- Double Action
- Trigger Action
Single Action Airbrush
The single-action airbrush has one control for activating the atomized paint stream. This means that it only has 2 positions – on or off.
Therefore, single-action airbrushes are the simplest and easiest to use – you just point and shoot. The paint stream remains constant throughout the entire stroke.
The best use for single-action airbrushes is for laying down large amounts of paint for coatings or fill patterns. The downside of this action style is the lack of control for intricate patterns and detail-work.
Double Action Airbrushes
The double-action airbrush is the most common and the most versatile style of airbrush. The action allows you to control both the airflow and the paint stream.
To activate the airflow, you push down on the double-action trigger. By pulling back on the trigger, you progressively activate the paint stream – making it wider as you pull back.
The double-action airbrush gives you much more control over the airbrush stroke than its single-action counterpart.
In fact, a double-action airbrush can do everything a single-action airbrush can do and more.
If you want your double action airbrush to behave like a single action, you can simply pull all the way back on the trigger to maintain a consistent paint stream.
Trigger Action
A trigger action airbrush is another category that describes the paint and airflow control mechanism. These airbrushes use a pistol-style pull-trigger instead of a button on the top.
Trigger action airbrushes can be either single action or double action in that the trigger can either only activate the air or also variably control the paint stream.
Therefore, the trigger action style airbrush is a matter of preference and can be used for many different applications. However, a normal double-action airbrush would be more ideal for extremely fine detail work such as illustrations.
Airbrush Mixing Types
The mixing type is another airbrush classification. This refers to where the paint is mixed with the air stream to produce atomization. The two types of airbrush mixes are:
- Internal Mix
- External Mix
Internal Mix Airbrush
An internal mix airbrush combines the paint and airstream together within the body of the airbrush. It is by far the most common type of mix in the airbrush world nowadays.
External Mix Airbrushes
External mix airbrushes introduce paint to the airstream outside the airbrush directly in front of the nozzle. The combined streams produce atomization and the particles are then projected through the air onto the substrate.
Now that you know about all the different kinds of airbrushes, let’s talk about what you need to get started airbrushing RIGHT AWAY.
Airbrush Equipment | Everything You Need to Get Started
An airbrush kit is made up of three main components:
- Airbrush
- Airbrush Hose
- Airbrush Compressor
The Best Airbrush for Beginners
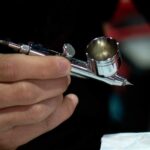
The airbrush is your trusty steed. Without it, you are nothing as an airbrusher. This is why I recommend getting something decent even for your first airbrush and taking good care of it.
My recommendation for the best beginner airbrush is a double-action internal-mix gravity-fed airbrush. The reason being is that this airbrush can do everything that the other types of airbrushes can do and more.
The double-action gives you full control over your paint stream and provides far more versatility than the single-action. The internal mix is frankly a design improvement on the antiquated external mix option. Gravity-fed hoppers allow you to fill the cup with any amount of paint you see fit instead of being limited to just one bottle.
For more on this, check out this article on how to choose the right kind of airbrush.
The best value double-action internal-mix gravity-fed airbrush on the market is the Iwata Eclipse HP-CS. Anyone that has been following Metastate Paint for a while knows how much I love this airbrush and how highly I speak of it.
For an airbrush in its price range, the craftsmanship is unmatched. If I have learned anything from airbrushing over the years, it is to not try and use something cheap that will break. You will inevitably have issues with clogging, paint splattering, and will eventually have to replace it anyway.
Don’t put yourself through the same hardship that I did.
Instead, get a good-quality airbrush like the Iwata Eclipse that you can grow into as you learn.
Airbrush Hose
The airbrush hose is a fairly basic but crucial part of your airbrushing setup. The hose delivers air from the air compressor to your airbrush.
There are some options to choose from, but for a good beginner hose, I would recommend a braided airbrush hose with at least 10 ft in length.
Also, make sure the airbrush connection matches the thread type of the hose. Some airbrushes have NPT threading while others use BSP.
This Iwata Medea hose will fit perfectly with your Iwata Eclipse Airbrush.
For more on airbrush hoses and choosing the right thread type and size, check out this article about how to pick the right airbrush hose.
Airbrush Compressor
The airbrush compressor pressurizes air that is needed to produce an atomized air stream. Your first air compressor doesn’t have to be anything fancy, but I recommend getting something with a holding tank.
A holding tank allows the air compressor to charge up, so if you are airbrushing at high PSI for an extended period, the motor has less chance of overheating.
Here’s an article that goes over the best airbrush compressors.
An airbrush-specific compressor is also a good bet for your first airbrush setup as it will be simple to hook up. However, you can also use a normal shop air compressor for airbrushing.
Check out this article that will teach you everything you need to know to hook up a normal compressor for airbrushing.
Now that you have the core pieces of your airbrush setup, let’s take a look at what supplies you’ll need.
Airbrush Supplies
The 3 main supplies that you will need to start airbrushing are:
- Airbrush Paint
- Airbrush Cleaner
- Airbrush Reducer
With these 2 supplies, you can seriously start airbrushing immediately. For additional items that are useful in your airbrushing setup, check out this article on airbrush equipment and supplies.
If you’re good to start with the bare minimum, then read on.
Airbrush Paint
Airbrush paint is slightly different than regular paint. It’s made with fine pigments that are small enough to atomize and flow out of the tiny airbrush nozzle.
Therefore, the easiest way to get started in airbrushing is to get some airbrush-ready paint.
Airbrush paint is commonly divided into 2 categories:
- Water-based paint *BEST FOR BEGINNERS*
- Solvent-based paint
Water-based airbrush paint is the simplest to use because it can be reduced with water, and it is usually non-toxic. However, the performance will be slightly less than sovlent-based paint – especially for airbrushing fine detail work.
Because of its non-toxic and easy mixing properties, I highly recommend using water-based paint for beginners.
Solvent-based airbrush paint is harder to use because it is toxic and often has complex additives in the mixing process.
The upside of solvent-based paint is its performance in the airbrush and on the substrate (the surface on which you are airbrushing). This is why automotive airbrush artists use almost exclusively solvent-based airbrush paint.
Airbrush Cleaner
Airbrush cleaner is a must for every new airbrush enthusiast.
Don’t try and cut corners like me and clean your airbrush with just water when you’re starting out. Your airbrush will slowly build up dry paint in the body and the nozzle. Eventually, the airbrush will become completely clogged with build-up and cleaning will be almost impossible.
instead, get a good airbrush cleaner at the beginning like Iwata-Medea Airbrush cleaner to save yourself the headache.
For more, check out this article on the best airbrush cleaners.
Airbrush Reducer
Airbrush reducer thins out the airbrush paint and improves flow out of the airbrush. While you can get away with using some airbrush paint straight out of the bottle, some paints are too thick.
This is where it’s handy to have a bottle of airbrush reducer to add into your paint mix.
The main thing to remember about reducer is to match it up with the brand of airbrush paint. Some paints and reducers work well together, but not always. A sure way to get nice smooth airbrush flow is to use the same brand reducer as the paint you’re using.
Check out this article for more on airbrush paint and airbrush paint additives.
Great, you have everything you need to start airbrushing, Let’s dive into how to setup your airbrush kit.
How to Set Up an Airbrush Kit
Setting up an airbrush kit is relatively straightforward. The end goal is to connect your airbrush with your air compressor with the hose.
STEP 1: Connect the airbrush hose to the compressor. Screw-in the end with the larger 1/4 inch connection.
STEP 2: Connect the airbrush hose to the airbrush. The airbrush connection end of the hose has a smaller 1/8 inch connection. Screw this end into the bottom of your airbrush.
STEP 3: Plug in the air compressor and let it charge up to the set pressure level. Set the air regulator to between 15 – 30 PSI – this is the optimal pressure range for airbrushing.
STEP 4: Test the airbrush by blowing air out of it. Make sure that the air fully activates when you push down the trigger.
STEP 5: Put a few drops of airbrush paint into your airbrush. You don’t have to fill the cup up all the way, just a few drops at a time is enough.
You’re all set up and ready to go!
There you have it, a little rundown on what you need to get started airbrushing right away.
The main takeaway that I took from learning this craft over the years is that you just have to pick it up and try it. It seems like a lot to learn (and there is) but you can get started with the basics today. Part of the journey of airbrushing is learning along the way.
Hopefully, this article has given you the information and inspiration that you need to take that first step and get started. Airbrushing is very fun and rewarding and I hope to see more airbrushing out in the art world.
Till next time, keep on brushing!