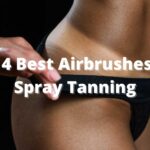
So you’ve been online, and you’ve gotten wind of the Temporary Airbrush Tattoo trend. Maybe you’ve tried getting one before and now you want to make your own. Or maybe you’re an aspiring tattoo artist who wants to work on something less risky than permanent tattoos.
The bottom line is that you want to start making your own Airbrush Tattoos.
Well, it isn’t as difficult as it may seem. There are many things to consider, but the starting process is simple enough for anyone to become an airbrush tattoo artist. With time, you can grow your skill level, airbrush kit, and clientele.
You can learn more about how an airbrush works if airbrush tattoos are still a relatively new concept for you.
This article will help you learn the know-how of Airbrush tattooing.
What do I Need to Make Airbrush Tattoos?
You can start airbrush tattooing right after you’ve got the necessary equipment. Here are a few essential tools to get started with airbrush tattooing:
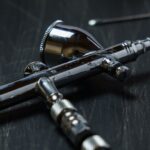
1. An Airbrush Kit
Like any other artist, your kit is the first thing you need. It consists of three parts:
- A compressor
- Hose
- And an airbrush.
I highly recommend getting a double-action airbrush for airbrush tattooing. The double-action trigger-style gives you far more control over the paint stream than a single-action airbrush and will make your temporary tattoos look professional grade.
Each component can be purchased separately, but they are also available as pre-made sets. Buying an entire set will save you the hassle of putting together a kit yourself.
As someone with little experience in actually using an airbrush, check out other articles in the airbrush category on this site to get up to speed on how to start airbrushing.
You can find a rundown of the best Airbrushing kits for beginners here and learn more about what makes a good-quality airbrush?
2. Airbrush Tattoo Ink
The fuel for the airbrush is its paint. In order to make good quality airbrush tattoos, you need high-standard inks which are approved by the safety board of your country.
The primary safety requirements from your inks are that they are dermatologically tested, (preferably) fragrance-free, and non-toxic. The artistic requirements are vibrant pigment, evenly dispersible, and long-lasting (for up to 2 weeks).
While you may use regular airbrush body paint, keep in mind that it is water-soluble and only lasts on the skin for about a day. For your trial runs, this may be a good buy. However, you will need to invest in high-quality airbrush tattoo inks for your clients.
Great temporary airbrush tattoo ink is usually alcohol-based.
Learn more about how much paint you should put in your airbrush.
3. Stencils and Designs
Stencils are the key to making great temporary airbrush tattoos that impress.
Premade stencils and designs are an integral part of every airbrush tattoo artist’s arsenal. They help give clients examples to choose from and make your job easy and straightforward
You can always add multiple colors or mix different designs to add some jazz while using stencils, but the basis of your design will be the stencil that you use.
If you want more control over your stencils, you can either buy sticker-back stencils or non-toxic stencil adhesive to stick them to the skin.
You can get started with airbrush tattoo stencils from Amazon. But you will want to start building your own collection as you start to do more airbrushing.
Here’s an article about how to build your own stencil collection and keep your artwork fresh.
4. Ink Removal Material
To keep your hands, kit, and workstation clean, you need to be equipped with suitable material for ink removal.
Alcohol-based inks last much longer than water-based body paints – up to 2 weeks in if you really take care of it.
These cannot be removed by water and soap.
To remove an alcohol-based airbrush tattoo, you will need 70% isopropanol (you could also try rubbing alcohol) or baby oil.
Baby oil can be used on the skin but isn’t recommended for your equipment. It is slippery and doesn’t evaporate after rubbing as alcohol does. This can get uncomfortable if you’re not used to baby oil on your skin.
5. Additional Material
Here are some other things you can add to your airbrush tattoo equipment:
- Baby Powder is used to set the tattoo after it is applied to help it last longer.
- Glitter can be added on top of the tattoo to intensify its appearance.
How to Assemble an Airbrush Tattoo Kit?
If you’ve never operated anything quite like an airbrush before, you might be nervous when looking at your kit. You’ve only got three main components, but your inexperience with handling them could stress you out a little more than needed.
But don’t be scared, there’s nothing to worry about.
Putting your kit together is an easy task. Here is a simple rundown on how you can assemble the equipment once you get your hands on all the components mentioned above:
- Remove the components from their packaging and take off any plastic covering.
- Detangle the hose and attach it to the airbrush by screwing it onto the bottom of the airbrush.
- Attach the hose to the designated spot on the compressor. Many compressors use a quick-connect feature to make coupling easy. Check out this article on how to use a normal air compressor for airbrushing.
- Check your air pressure before using your airbrush. You should remain within the range of 5-12 psi for airbrush tattoos.
- Remove the lid from the airbrush cup and pour your tattoo ink inside. Replace the lid to make sure that no ink spills onto the client.
- Push down on the airbrush trigger to activate the air and pull back on the trigger to activate the paint stream. The air pressure is controlled by a regulator on the compressor of the airbrush.
Once you’ve gotten your airbrush kit assembled, you can move on to applying the airbrush tattoo.
Step-by-Step Instructions for Applying an Airbrush Tattoo
Applying an airbrush tattoo is entirely safe and simple to do. Here are the steps you need to follow:
- Clean the desired area using isopropanol
- Stick the stencil onto the skin with the adhesive backing or non-toxic stencil adhesive.
- Shake tattoo ink well to mix any settled pigment. This ensures even ink dispersal.
- Spray a thin layer of ink from three to five centimeters away. Lightly build up ink layer by layer – too much spray at once will cause the ink to run.
- Remove the stencil while the tattoo is wet. (You can wipe down unwanted droplets using isopropanol).
- Add baby powder on top with a makeup brush to set the tattoo in and take away excess moisture.
- Brief your client about necessary aftercare, demonstrate how to re-powder, and provide instructions on how to remove the tattoo.
How to Start Working as a Temporary Airbrush Tattoo Artist
The market for temporary airbrush tattoos appears to be growing every day. More and more people are interested in trying them out, and more and more body painters consider adding airbrush tattoos to their repertoire.
You may not be able to get a place in a tattoo shop or company as a beginner. Still, you can find many opportunities to get started in your area.
Airbrush tattoos seem to be most popular among children. Since children are too young for permanent ones and tired of older temporary tattoos, airbrush tattoos are their new fascination. Their safe and simple application and removal are what attract the parents. You could start off by offering your services to children at:
- birthday parties,
- the local fair, or
- in the local mall.
If working with children isn’t your cup of tea, you can try out music festivals or parties. Usually, these events have an age limit, so you’ll work with a mature age group. Airbrush tattoos are generally seen on people attending music festivals, raves, or other local events, so many attendees will definitely be willing to get some tattoos from you.
All you have to do is start!
After gaining some experience, you can always try to join bigger groups or companies to take your artistry one step further. Learn more about how much does an airbrush tattoo artist make?
How to Remove Temporary Airbrush Tattoos
The best part about temporary airbrush tattoos is their easy removal. The removal method depends on the type of ink used.
If the ink is water-soluble, you can simply wash it off with water and soap. If the skin was damaged after applying the tattoo, wait for it to heal and be gentle.
If it is oil-soluble, you will need cotton pads and Baby Oil or 70% Isopropanol. You can choose between the two options based on your skin type. For dry or sensitive skin, use baby oil, and for normal skin types, use isopropanol.
Here are the general steps for removing an airbrush tattoo:
- Wash the tattooed area before starting.
- Soak the cotton pad with an appropriate amount of baby oil or isopropanol.
- Rub onto the tattoo you want to remove.
- If the ink is not removing properly, soak the cotton pad with more liquid rather than adding force while rubbing.
- After the ink is gone, you can wash it with soap and water to remove the residue left behind.
If it is a large tattoo or has dark-colored ink, you may need to repeat this process until it is entirely removed.
Note: Do not try to remove a tattoo on damaged skin. Do not apply either substance to any open wounds or rashes. If there is a problem, contact the doctor.
Some Tips and Tricks for Airbrush Tattoos
With any new experience, there is always a learning curve, so don’t be afraid to make mistakes and improve as you go.
Here are some words of advice and trade secrets that could help you along the way:
- If the tattoo doesn’t stick properly, it could be because of the temperature or because the area being used isn’t clean enough. You can always restart and try again. Always be sure to powder properly after application.
- You should clean your airbrush before applying every new color. If you don’t, colors will mix and may make a muddled mess.
- Water produced from condensation can mix with ink, ruining your application and the quality of the ink. Check for a compressor with a built-in water separator when buying your kit.
- Do regular maintenance on your kit to help fix minor faults affecting your application and help you in the long run by saving money on replacement parts.
- To save cash, use reusable stencils and take good care of them so they will last for years to come.
Airbrush tattooing is a simple process that only requires some basic airbrush gear to get started. If you can get your hands on a good quality kit and practice your skills, you’ll be good enough to wow people in no time.
There isn’t any rocket science involved in any of it. Just make informed decisions about what to buy, and how to use it, and keep on improving.
FAQ
1. Do I need an expensive pro-airbrushing kit?
No, you don’t. Any good-quality kit will take you a long way. You should upgrade specific components as you learn your preferences, but they don’t have to be from premium or expensive brands.
2. Can I use cosmetic inks or paints?
You can experiment with different paints and inks as long as they are certified non-toxic. Airbrush tattoos are very safe if you take the right precautions.
4. I have a kit, but I don’t understand how to use it?
That’s why we built metastatepaint.com! Check out the How-Tos category on this website to learn more about how to use your airbrush kit for the best results.
5. How can I improve my airbrush tattooing skills?
In one word? Practice! It takes getting familiar with the process and trying out new things. Eventually, you’ll gather enough experience to feel confident with your skills.