A clogged airbrush is one of the most frustrating things to deal with as an airbrush artist.
Imagine you’re painting an amazing piece of art and you’re about to lay down the finishing touches. Your airbrush sputters, spatters, and the paint stream comes to a complete stop. You peer into the nozzle and see a big chunk of paint clogging it right up.
You spend the next 20 minutes trying to unclog the nozzle to no avail – your art piece fading into a reminant of the distant past.
This scenario has been all too common for me. As an airbrush artist of many years, I have dealt with too many clogged nozzles to count. It’s usually a result of dried paint clumps getting stuck in the airbrush and impeding the flow.
The good news is that I developed a 4-step method to fix any clogged airbrush quickly and reliably:
- Clean the nozzle cap
- Clean the needle tip with your fingers
- Backwash the airbrush
- Take apart and clean the airbrush
When you get good at this method, you should be able to unclog your airbrush in 5 minutes or less without damaging any components.
The method is simple, straight-forward, and designed to start with the easiest solution first. move to more complex solutions, and get your airbrush unclogged in the least time possible.
Read on to learn about how the unclogging system works.
Step 1: Clean Nozzle Cap
The first step in unclogging an airbrush is to clean the nozzle cap. Take a look at the front of the nozzle cap – is there dry paint caked all over the opening?
Dried paint on the front of the nozzle cap can build up as little paint dribbles out of the nozzle opening repeatedly. Eventually, it will become completely blocked.
Sometimes you can pick the dried paint off with your fingers in one big piece like a dried pancake. If the paint is more stuck onto the metal, use a toothpick to gently scrape the paint away.
NOTE: A wooden toothpick makes a great airbrush cleaning tool because it doesn’t scratch the metal. Even a small scratch can make paint stick to the airbrush easier and allow paint clogs to happen more frequently.
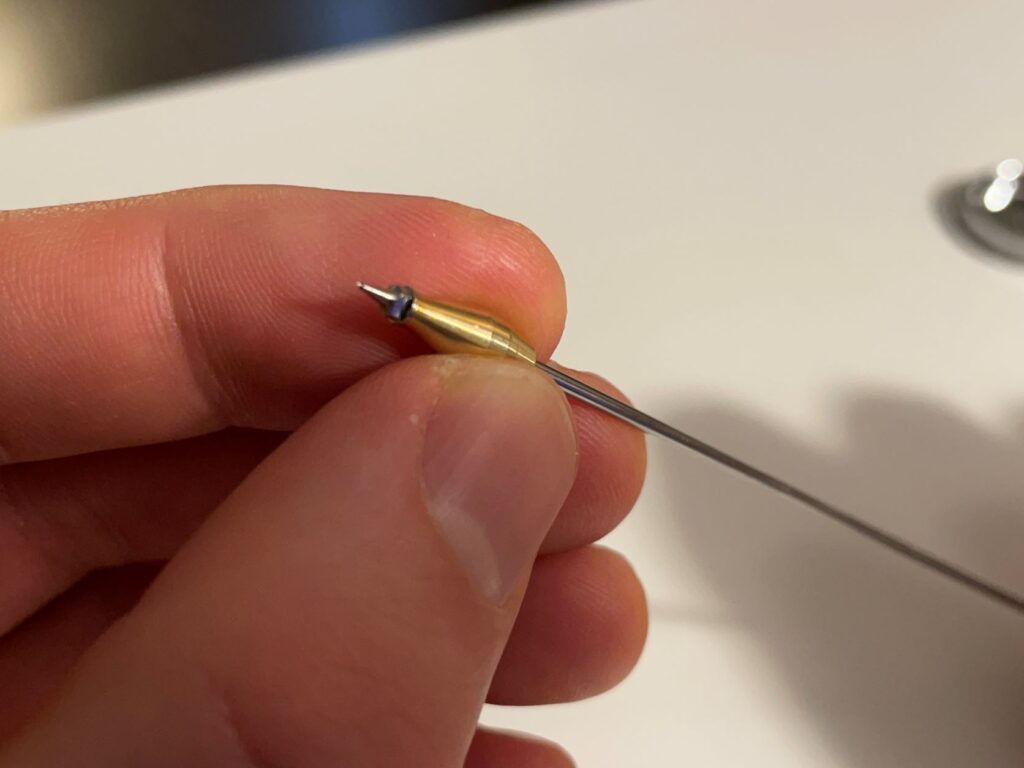
Step 2: Clean Needle Tip
Once the nozzle cap is clean, make sure that the needle tip is clear of dried paint. Dried paint can gather on the needle tip especially when you’re using thick paint and low PSI for drawing fine details.
Remove the nozzle cap and carefully pick any dried paint off the end of the needle. Be sure to only pick from the base of the needle towards the tip. If you pick from the tip towards the base, you’re risking a bent needle which makes it pretty much unusable.
PRO TIP: If you’re painting high detail with low PSI for a long period, you can leave the nozzle cap off and periodically clean the needle tip with your fingers. This method will prevent tip dry from clogging the nozzle and speed up your workflow.
Step 3: Backflush the Airbrush
After the needle tip is thoroughly cleaned, replace the nozzle cap to prepare for backflushing the airbrush.
A backflush involves blocking the airstream so fluid comes back through the airbrush and bubbles up in the fluid cup. A backflush cycle can dislodge paint particles in the nozzle housing and expel them back into the fluid cup.
Here’s how to backflush an airbrush:
STEP 1: Put a little cleaner in the fluid cup
STEP 2: Cover the opening of the nozzle cap with your finger or a rag to block the flow of air.
STEP 3: Engage the air and lightly feather the paint stream to move the needle back and forth. Air bubbles should form in the cup.
STEP 4: Dump out the used cleaner from the fluid cup.
STEP 5: Wipe out the cup with a paper towel or rag.
Here’s a great video that shows exactly what a backflush cycle looks like:
Step 4: Take Apart Airbrush and Clean
When all else fails and the airbrush is still clogged after following the above steps, it’s time to take it apart for cleaning.
This article about how to maintain an airbrush goes into detail about how to perform a deep clean.
The main thing to clean out in the case of a clogged nozzle is the nozzle itself. The best technique that I have found over the years to accomplish this feat is to poke dried paint out of the end of the nozzle with the needle.
Gently use the tip of the needle to apply pressure around the inside of the opening of the nozzle. A soft in-and-out motion will help scrape and dislodge dried paint so it can be pushed out of the end.
NOTE: Be careful not to push too hard and blow out the end of the nozzle. Once the hole is deformed larger than it’s supposed to be, it is essentially wrecked and will have to be replaced.
Once the airbrush has been deep cleaned, put it back together with some love and care. Blow on it for good luck, and spray a few drops of water/airbrush cleaner through the system (do the same thing with a reducer for solvent-based paint).
With any luck, your clogged airbrush is now unclogged and you’re ready to get back to airbrushing!
How to Prevent a Clogged Airbrush
The best way to deal with a clogged airbrush is by trying to prevent a clog in the first place.
Regular cleaning is the best way to prevent your airbrush from getting clogged up.
Here are a few tips for how to keep your airbrush clean on an ongoing basis:
- Clean regularly
- Backflush the airbrush between every few colors.
- Blow airbrush cleaner through the nozzle after every few color changes.
- Give your airbrush a quick clean and dry after every use before putting it away.
- Give your airbrush a deep clean after every few uses or before longterm storage.
- Use wooden toothpicks instead of metal picks to scrape away dried paint – metal picks will scratch the airbrush metal which causes dried paint to build up faster.
Here’s my favorite airbrush cleaner that’s great at dissolving dried paint and helps to prevent airbrush clogging:
A cleaning pot like this works amazing for capturing overspray so you don’t have to breathe in a cloud of airbrush cleaner:

A clogged airbrush is nothing to fear when you have a game plan. Follow the 4 step method in this article and you should be unclogging your airbrush in 5 minutes or less.
With a few preventative measures, you can minimize how much the nozzle gets clogged in the first place.
Clean regularly, have the right tools like toothpicks and rags on hand, and you will be spending much less time troubleshooting and more time doing the enjoyable part of airbrushing – laying down some paint!