Airbrush paint is the medium that can make or break your artwork. Fill your airbrush with clean, well-mixed paint, and your airbrush strokes are sure to come out even and smooth.
Fill your airbrush with chunky and clumpy paint and you can expect your paint stream to be a sputtering splattering mess.
One of the main impediments to a silky smooth airbrush paint stream is dried paint clumps that form in old paint.
Airbrush paint should be strained if it has been sitting for several months. Over time, airbrush paint settles and the pigments can start to dry out. Clumps of paint can form in the paint mix which can clog the airbrush nozzle, impede proper atomization, and produce an irregular paint stream.
Read on for all the details on why you should strain airbrush paint, how to strain airbrush paint, and recommendations for the best airbrush paint strainer.
How to Strain Airbrush Paint Step-by-Step
What you’ll need:
- 190 Micron Paint Strainer Funnel
- Scissors
- Bottle of Airbrush Paint
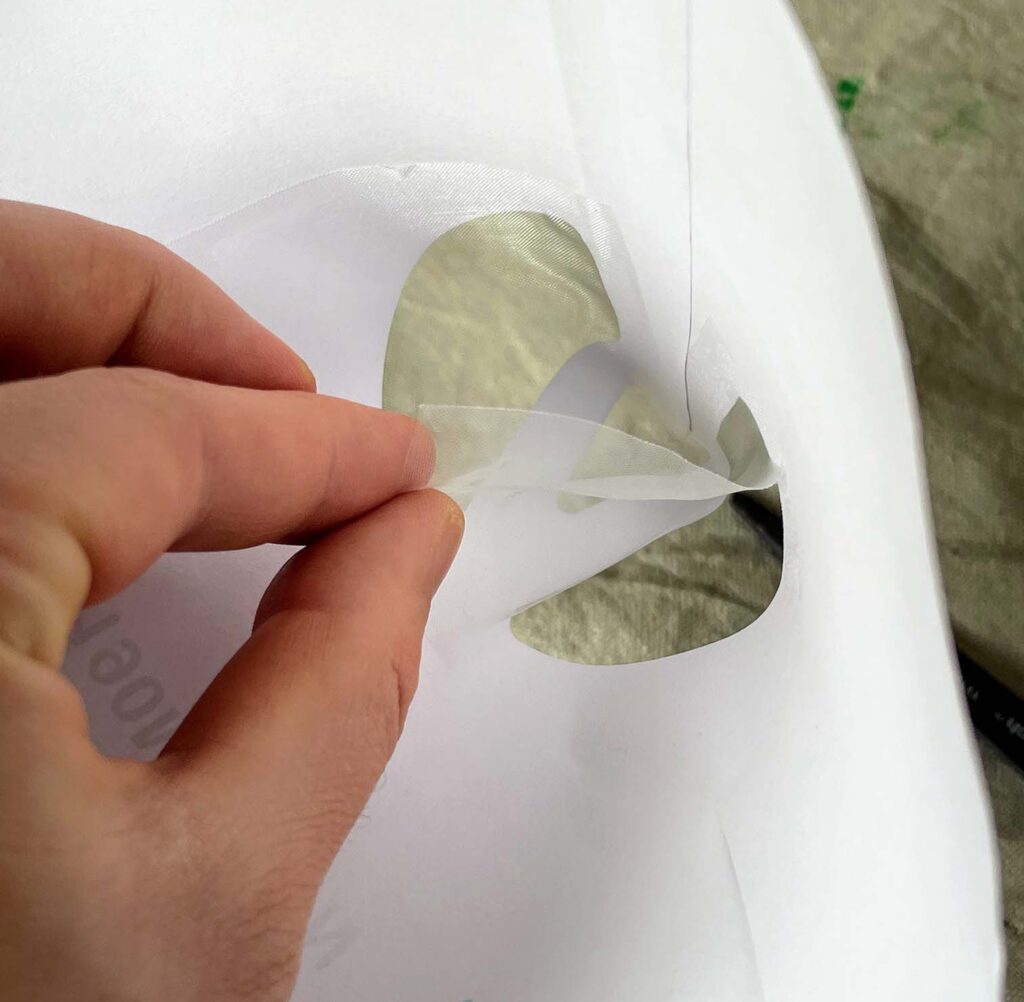
STEP 1: Remove the stainer mesh from the paper funnel. Pick a corner and carefully peel the mesh away from the paper.
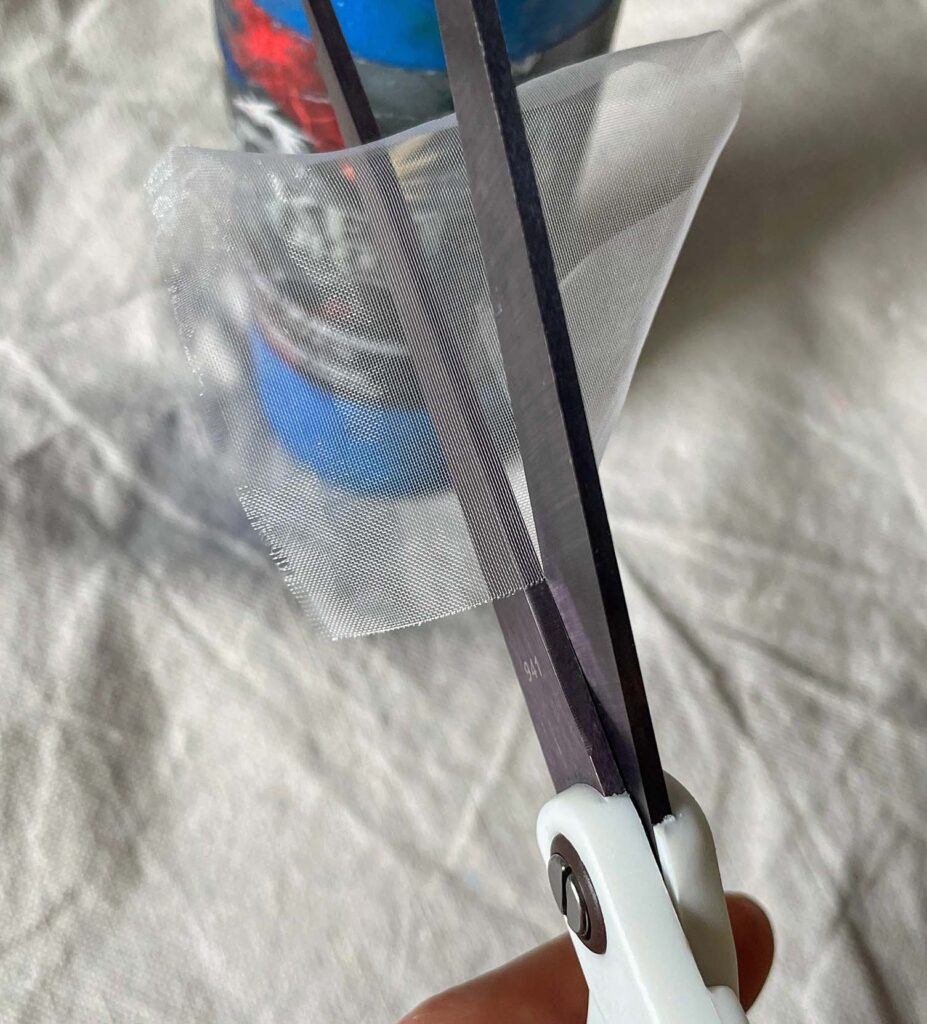
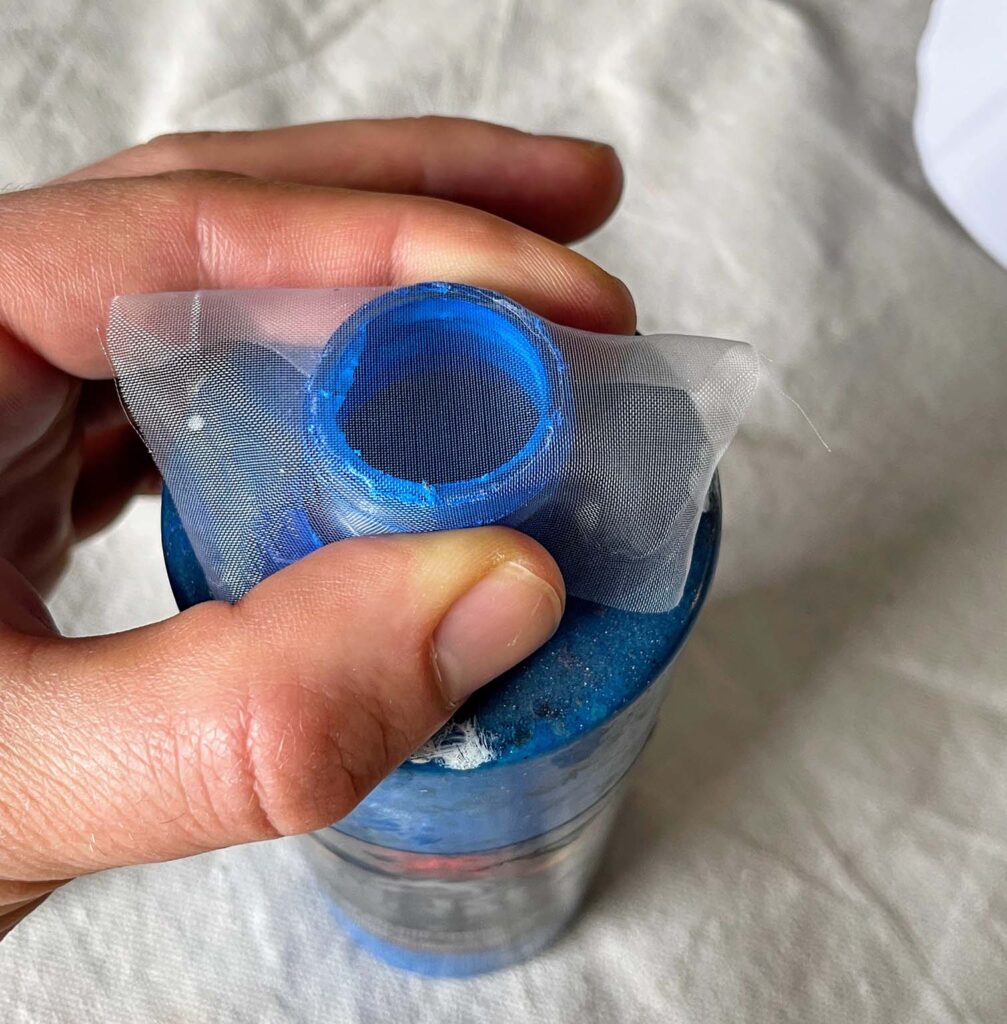
STEP 2: Cut the mesh into sizes that will cover the airbrush paint bottle opening.
STEP 3: Remove the cap from the airbrush paint bottle.
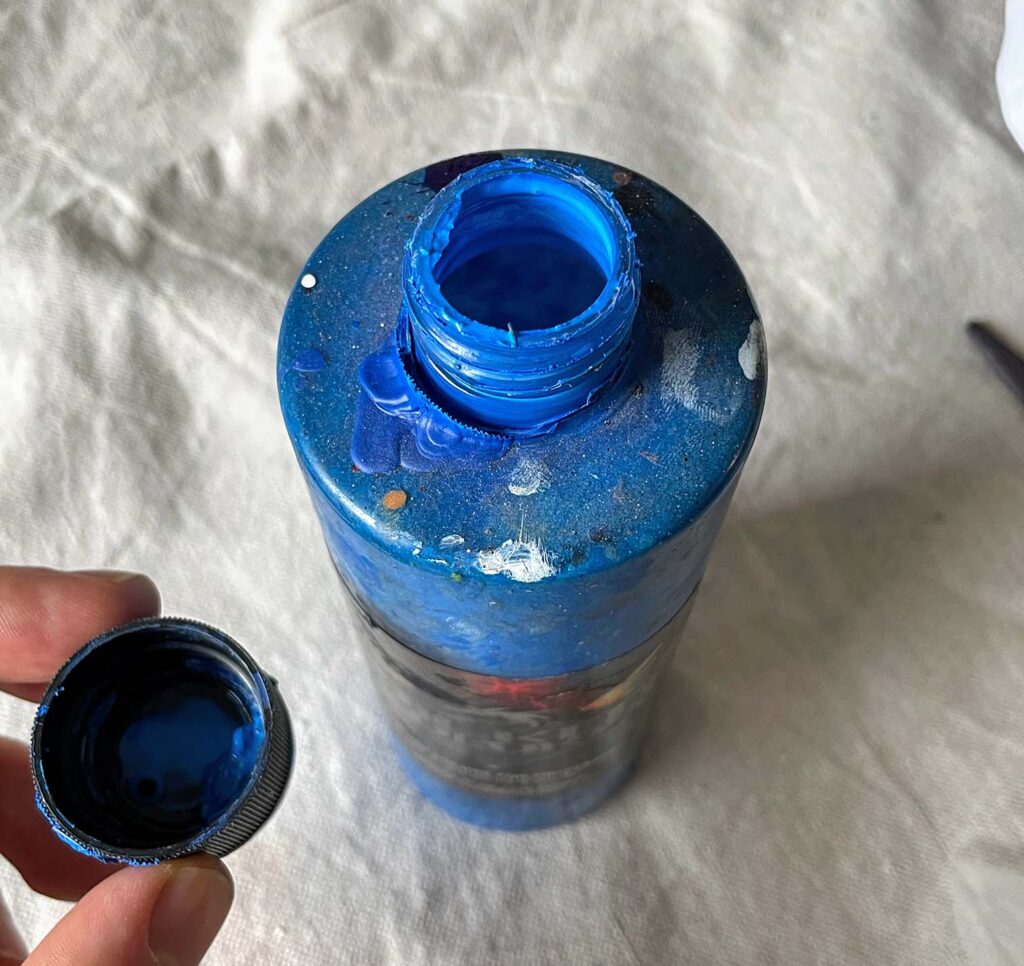
STEP 4: Place the strainer section onto the airbrush paint bottle opening.
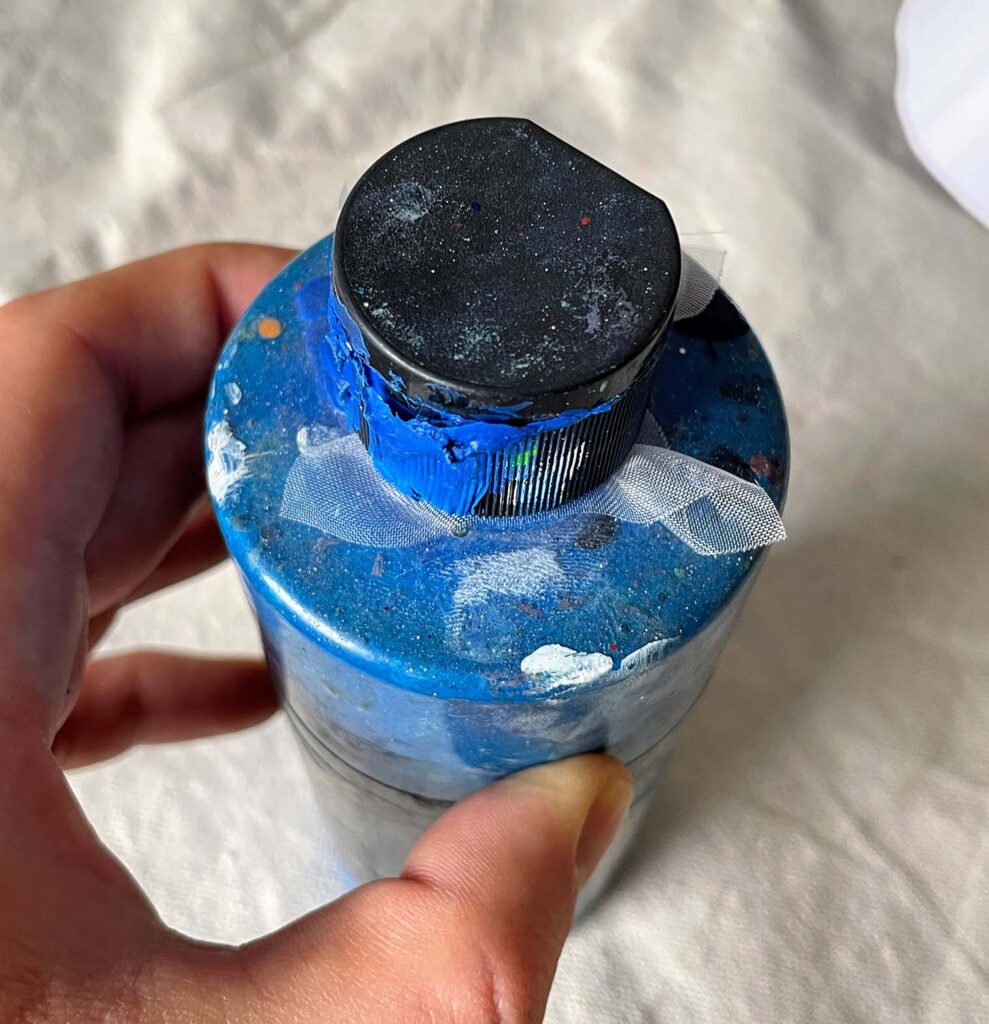
STEP 5: Hold the strainer section in place and screw the airbrush bottle cap back onto the bottle. The threads from the airbrush bottle should hold the strainer section in place.
Once you have a paint strainer on the cap of your airbrush bottle, it’s important to change it once in a while. Unfortunately, for all the convenience of this method, it is not a permanent fix.
Eventually, paint will start to dry on the screen mesh and clog up the bottle opening. To fix this, simply change out the piece of strainer for a fresh one.
For this reason, I recommend keeping a stack of paint strainers on hand to apply to bottles that you intend to use frequently. There’s no point in putting strainers on all your bottles only to use them once and switch them out again later.
Why you Should Strain Airbrush Paint
Straining airbrush paint is an extra step in your workflow that’s easy to overlook. After all, its tempting to fill up your airbrush and just start painting right away.
If you have any doubts about the value of straining your airbrush paint, let me assure you that clean, clump-free airbrush paint is key to a smooth airbrushing session.
Here are the top 5 reasons why you should strain your airbrush paint:
1. Dry Clumps of Paint Will Clog Your Airbrush
Simply put, the tiny opening between your airbrush nozzle and needle is not large enough to expel large clumps of paint. Died bits of paint will quickly build up and clog in the nozzle tip area.
2. Nozzle Clogging Slows Down Workflow
It’s pretty self-explanatory that if you’re busy unclogging your airbrush, you won’t be spending as much time painting. Airbrush troubleshooting wastes lots of time.
By the time you tear your airbrush apart, unclog the airbrush nozzle, clean it out, and put it back together again, you’ll probably forget what you were just working on. Just like that, your airbrush project is now taking twice as long to complete.
3. Clogged Nozzles Can Cause Sputtering and Splattering
Disturbances in the nozzle can cause your airbrush to splatter paint instead of producing a nice even paint stream. This splattering can happen at inopportune times and wreck a once nice project halfway through. Best try to avoid clogged nozzles instead of just hoping that a splatter doesn’t happen.
ARTICLE: What Causes Airbrush Splatter and What to Do About It
4. Dealing with Clogged Nozzles is Frustrating
Constantly pausing to unclog your airbrush nozzle is enough to make you want to throw your airbrush at the wall in anger. Best to keep a calm head so you can focus on the artwork.
5. Unclogging the Airbrush Nozzle Can Damage It
Unclogging the airbrush nozzle involves poking and prodding it with the needle and being overall rough with it. This can cause the nozzle opening to get deformed over time.
Once the nozzle is deformed, it will not create a good seal around the needle and the paint stream will be compromised. The only way to fix a deformed nozzle is to replace it.
With the price of new nozzles, it is far more economical to minimize nozzle cleaning and unclogging.
ARTICLE: Airbrush Nozzle and Needle Sizes
Best Stainer for Airbrush Paint
Airbrush paint strainer material should be thick enough to take out dried bits of paint but coarse enough to let mixed paint through.
I’ve found that the ideal coarseness for an airbrush paint strainer is about 190 microns.
The TCP Global 190 Micron Paint Strainers are the paint strainers that I use to strain airbrush paint. They have a good amount of strainer material that can be used directly on the opening of an airbrush bottle. The 190-micron mesh is the right coarseness for taking out clumps while still allowing paint to come through.
Taking a little extra time to strain your airbrush paint can save you a ton of headaches in the long run.
The strainer on top of the bottle method is the most convenient way that I’ve found to strain airbrush paint. After paint has been sitting for a few months, it’s really a no-brainer to take some to pop a strainer on the top.
With clean clump-free airbrush paint at the ready, you can rest assured that your nozzle clogging days are over and its smooth-airbrush sailing from here on out.